DavidsTea’s Phoenix Oolong

Phoenix Oolong by DavidsTea
Oolong Tea / Straight
$24.98 for 50g

First Impressions

Tiny disclaimer, I did get Phoenix Oolong for free via the DavidsTea Frequent Steeper program as one of my redemptions for the quarter (who else is happy that they removed the price cap on the redemption teas?!). Phoenix Oolong is a limited edition, online exclusive – which means that the tea is available online only and isn’t available at their retail locations, which is really unfortunate for anyone who just wants to try to tea because it means buying the full 50g or using a redemption on a tea that they might not like.

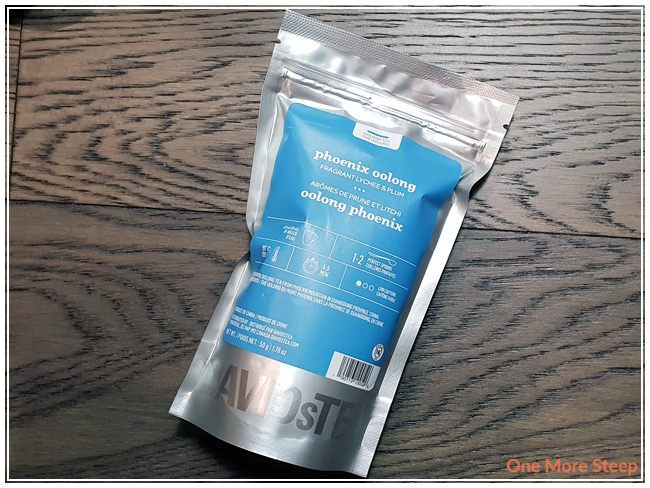
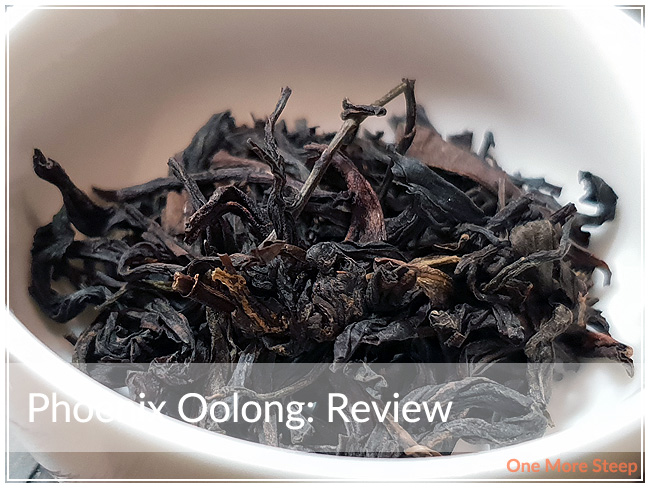
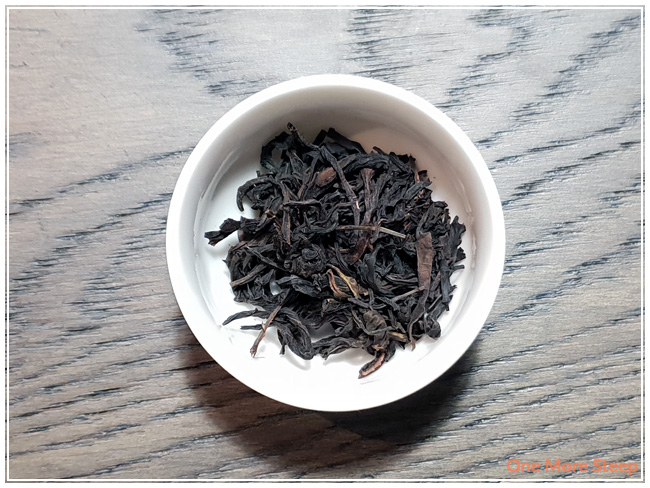
Phoenix Oolong came in a sealed, resealable foil bag with a printed label on it that gives some details about the tea. Phoenix Oolong is described by DavidsTea as having “fragrant lychee & plum” notes. When I opened the bag, I noted that the leaves are a dark, almost purpley-brown colour. The aroma of the dry leaf does remind me of a stone fruits, and it has a nice sweet floral fragrance that reminds me of lychee. Phoenix Oolong is a straight oolong tea from Phoenix Mountain in Guangdong Province, China. Phoenix Mountain is also known as Fenghuangshan (fenghuang is phoenix and shan is mountain).

Preparation

DavidsTea recommends steeping Phoenix Oolong in 90°C (195°F) water for 4 to 5 minutes. My initial steep was for 4 minutes.

First Taste

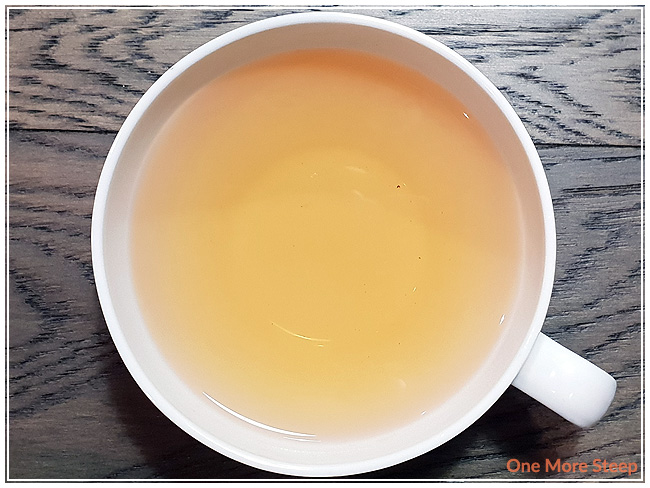
Phoenix Oolong steeps to a bright golden yellow with the initial steep. The aroma is a mix of fruity and floral, I find that the aroma of stone fruits (plum, apricots, peaches) is more prominent than the floral notes that I found in the dry leaf, although it is still present. The flavour is both fruity and floral in this straight oolong, I found that I can initial taste the plum notes, although part of it also reminds me of apricots. The floral sweetness is mostly at the end of each sip, and it mixes well with the fruity flavour to remind me of lychee. With a four minute steep, I found there to be zero bitterness or astringency. The tea has a bit of a thickened mouthfeel to it, which I found pleasant overall.

A Second Cup?

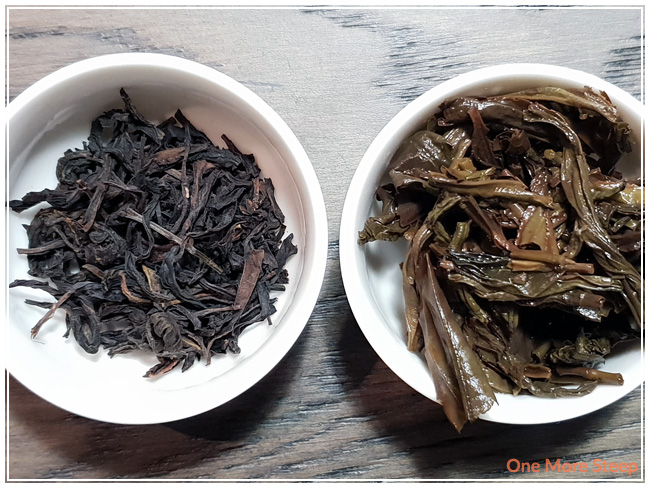
I resteeped Phoenix Oolong eight times (nine steeps total), adding an extra 30 seconds for each subsequent steep. I found that the colour was darker for the first two resteeps and gradually became lighter and lighter. The floral notes got stronger as the colour deepened. By the third resteep, it was very well balanced between the floral and fruity notes, and it was delicious.

My Overall Impression

I loved DavidsTea’s Phoenix Oolong. I’m pleasantly surprised and very happy that I did use one of my Frequent Steeper rewards on this. The oolong tastes great, I found the flavour to be fairly consistent throughout and really matched well with what DavidsTea had as the description. The leaves resteep remarkably well, and I think it’s definitely a must for resteeping over and over again. Yes, I do think that the tea is expensive for what it is, but given the quality (resteeping is a MUST for these leaves), it’s delicious and is just a very pleasant oolong. I think it’s definitely worth a try if you have the money in your tea budget or if you have a reward to use and you’re going to put in an online order anyways!

Curious about the cup rating system? Click here to learn more.

Steeping Blooming Teas

Blooming teas, or flowering teas, are bundled tea leaves around dried flowers. Typically when you pick up a blooming tea ball, you only see the tea leaves because the flowers are meant to be a surprise. During the steeping process, the ball opens up, unfurls, and the dried flower ‘blooms’ as it is hydrated in the steeping process. Commonly found flowers in blooming teas include globe amaranth, chrysanthemum, and jasmine flowers.

Blooming teas are typically made with white or green teas, as these teas are light in colour and allow you to visualize the floral blooms better. You will want to steep a blooming tea in either a clear glass teapot or cup in order to take in the whole ‘show’, as I like to call it.

Some people find that it’s difficult to steep blooming teas properly, or they wind up oversteeping blooming teas because the teas can be delicate and sensitive to oversteeping. I thought I’d share some of my methods of steeping a blooming tea to make a good cup of tea! Blooming teas can be expensive per pot, so it’s important to steep it properly to make it worth it!

I use a clear glass teapot, I find this best to see the blooms and to watch the ball of tea itself as it steeps. It just makes for a more beautiful tea experience.

The kettle I use has preset temperature settings (the Breville IQ Kettle, I’ve had it for 2+ years and it’s still going strong with daily use!) and I use the lowest temperature setting which is meant for green teas, 175°F (80°C). After the kettle has finished reaching the temperature, I let the water sit for about 5 minutes prior to pouring the water into my teapot. If you have a standard kettle that only boils (100°C/212°F) water, you’ll want to let the water sit for longer to cool down – open the lid or taking off the lid will help the water cool down faster.

Lowering the temperature of the water reduces the likelihood of scalding or burning the tea leaves and causing a bitter flavour. Some companies will provide steeping recommendations, but I find sometimes that their recommended water temperature is too high given the fact that there’s a longer steeping period for the blooming tea to fully open.

Each blooming tea will steep for a different amount of time, I consider it to be ready when the ball has opened up and the flowers have ‘bloomed’ as well – some blooming teas will have the flowers floating up to the surface. Often the process of blooming can take up to 5 minutes or more. I find that blooming teas with a white tea base are far more forgiving and less likely to result in a bitter cup of tea than one with green tea base. Blooming teas can also be resteeped! Because the flavours come from the tea leaves and blossoms, there’s generally no added flavouring and the tea leaves can be resteeped usually once or twice. The flavouring may be a bit weaker than the initial steep, but you can get more bang for your buck by resteeping the tea leaves.

DIY: Tea Advent Calendar

I have been on the hunt for the perfect tea advent calendar. While my local dollar store has a chocolate advent calendar for the low, low price of $1, there are many tea advent calendars available out there that are full of tea. Tea sachets, loose leaf tea, matcha – the sky is the limit, but there is no limit on price! I’ve come across tea advent calendars that vary anywhere from $35 to $150 (after currency conversion, although I did not take into account the shipping costs or potential customs & duties). But goodness gracious, I just don’t have it in me to drop $150 on a calendar, regardless of how good it may or may not be.

It may not surprise you that I have a lot of tea in my tea stash. So when faced with the idea of buying a $150 advent calendar, which was really enticing, it was pointed out to me that I had enough teas to come up with my very own custom DIY Tea Advent Calendar.

At first I protested, because there was just no way that I had 24 teas to have for the first 24 days of December. And then, upon reevaluation of my tea stash, I realized that I doth protest too much. I could easily come up with 24 teas that I would love to have over the course of the month. And that’s not even including the new-to-me tea that I purchased at the Vancouver Tea Festival earlier this month – should I be embarrassed at this point? Should I just embrace my tea enthusiast lifestyle? Anyways, I opted to do a 24 day Tea Advent Calendar because I’m going to be having Christmas morning at my parents’ house, and having tea with them (and they have a huge tea stash too! The apple does not fall far from the tree). I do love the idea of having a tea designated for Christmas morning, so if you’re wanting to do a 25 day Tea Advent Calendar that is totally okay too!

Of course, since I am putting together a tea calendar for myself, I know exactly what teas will be appearing throughout the month (if you continue to scroll down, I list out the teas that will be featured throughout the month of December – not in order).

For your very own DIY Tea Advent Calendar, you will need:

24 or 25 teas in sachet format or loose leaf
24 or 25 filter bags to fill yourself (if the tea is not in sachet format)*
24 or 25 envelopes
Number stickers, number stamps, or a marker
Holiday-themed stickers
Box or tray to hold everything

* If you’re going this route, don’t forget to include information about the tea on a piece of paper and tuck it into the envelope unless you’re into the idea of mystery tea! Some information you’ll probably want to know: type of tea, steeping temperature, steeping time. If the tea company doesn’t provide you with steeping instructions, check out my guide to Steeping Times for Different Teas!

I am using a mix of commercially made tea sachets and loose leaf teas. My first task was to decorate the 24 envelopes, because I consider that to be the more ‘fun’ aspect of this project. I stacked the envelopes and shuffled them with the number side facing down so I was blissfully unaware of which date I was filling. I stuffed the envelopes, sealed them with an appropriate holiday sticker, and then arranged them in numerical order. My DIY Tea Advent Calendar is now sitting by my kettle, waiting eagerly for December 1st so I can drink my daily cup of tea.

You still have time to put together your very own DIY Tea Advent Calendar! Or give as a gift to your favourite person! This whole process took me about half an hour – not including the purchasing of the tea.

If you’re short on tea, I recommend picking up a sampler box of tea sachets from your local tea shop or grocery store as it’ll help round out your 24 (25) teas. You can find envelopes, stickers, and markers at your local dollar store if you don’t have any on hand – or you can raid your favourite child’s arts & crafts box for the goods.

Continue reading “DIY: Tea Advent Calendar”