A few weeks ago, I had Katrina (@kdreyerco) over for a little afternoon DIY-ing. She came armed with pockets full of essential oils – all of them just smelled so good and we put them to good use by making sugar scrubs! These were so easy to make and they can be easily incorporated into your skin care routine. I’m all about self-care these days, and having sugar scrubs on hand really help with my skin care routine. I use sugar scrubs about twice a week (every 3 to 4 days) and I find that it’s frequent enough for me to keep my skin feeling extra smooth.
If you’ve never used a sugar scrub before, they are fantastic at exfoliating – the sugar helps to remove the surface skin cells and they can help hydrate your skin. You can use almost any type of sugar (don’t use powdered/icing sugar!) for your custom made sugar scrub. Brown sugar is softer, so it’d be a better choice for a sugar scrub that you’re going to use on your face. Raw granulated sugar is often more coarse, so it might be a better choice for your body or feet. Sugar scrubs can rub your skin raw if you’re using them too frequently – I find using them once or twice a week is sufficient, but you should keep your own skin sensitivity in mind and consider what part of your bod you’re using it for. I use about a tablespoon of sugar scrub at a time, I tend to use them on my feet. If you’re new to sugar scrubs, I would recommend making a small, single-use batch and test it out to see if it works for you and your skin.
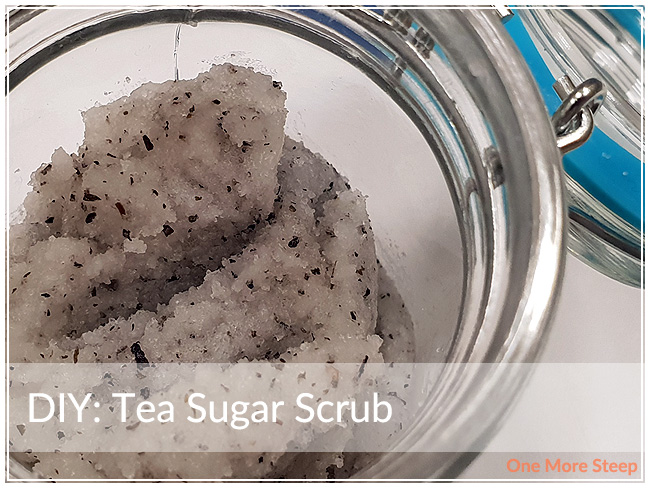
These tea sugar scrubs are super easy to make and they only contain four ingredients! Some of which you may already have in your kitchen, which is a nice bonus so you don’t have to go to a store to buy anything new.
You will need:
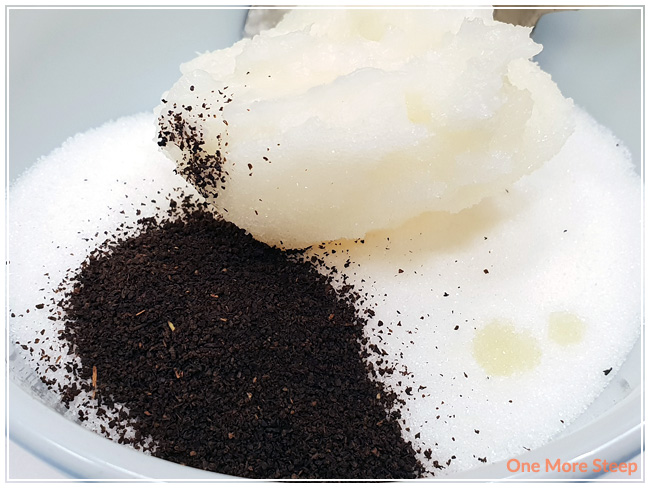
1 cup sugar
½ cup coconut oil¹
2 tea bags (contents) or 1 tablespoon of looseleaf tea²
Essential oil(s) of your choice
¹ You can substitute coconut oil for another oil of your choice, I use coconut oil because it has a mild aroma and I find it to be less oily than some other oils out there.
² I find tea bags easier to use because the tea leaves are already finely crushed. If you’re using looseleaf tea, consider breaking the tea leaves into smaller pieces with a mortar and pestle or with a rolling pin.
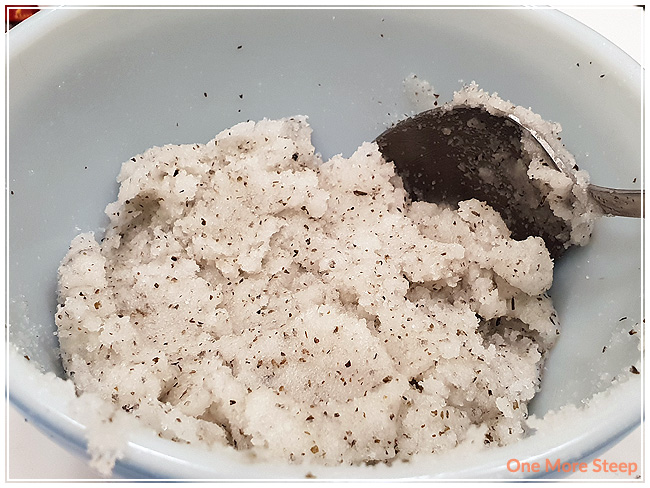
For a single-use batch, mix together 1 tablespoon sugar, ½ tablespoon coconut oil, ¼ teaspoon tea leaves, 1 drop of essential oil of your choice. This is also a great way to test tea and essential oil combinations to see if you like it before you have to commit to a larger batch!
If you want to make a smaller or larger batch, it is a 1:2 ratio of oil to sugar.
Simply combine all of the ingredients in a bowl – we used 3-5 drops of essential oil per blend. Remember – less is more! I found these great glass jars with rubber seals and lids to store the sugar scrubs in from my local dollar store.

Jasmine green tea with “Peace and Calming”.
The two blends that we made were:
1. Earl Grey black tea with 3 drops of bergamot essential oil
2. Jasmine green tea with 4 drops of a proprietary blend called “Peace and Calming” (contains tangerine, orange, ylang ylang, patchouli, and blue tansy essential oils).
Earl Grey tea with bergamot essential oil.
Some other combinations that might be nice are Earl Grey with lavender or peppermint oil, jasmine green tea with orange or lemon. I think a lot of citrus essential oils would pair nicely with a large variety of tea. I would recommend avoiding teas that are parts of blends (a lot of blended teas have dried fruit or nuts that may not pair well with oil as the dried fruit or nuts may go rancid in the sugar scrub).
Using a sugar scrub is easy. Put the desired amount into your hands (I usually use about 1 tablespoon’s worth each time) and then rub it into the area that you’re wanting to use the scrub on. One tablespoon is enough to do my feet, or my face, or my hands. Rub it gently into your skin and then it off with warm to hot water. Cold water will not do you any favours since there is oil involved.
Sugar scrubs can keep for quite a while, but do be careful when using them so you don’t introduce bacteria into your sugar scrub. I would recommend using a craft stick (e.g. popsicle stick) or a dedicated spoon to scoop out your sugar scrub instead of using your fingers. This can help limit the bacteria and moisture that goes into the sugar scrub (and helps to prevent it from spoiling). When it doubt, give it a sniff! It should smell the same as the day you made it. I’ve made a few sugar scrubs in the past and they kept easily for one month (I finished the batch at the one month mark). If your sugar scrub looks at all discoloured or ‘off’ compared to what it previously looked like, I would err on the side of caution and toss it and use it as an excuse to make a new batch!